Mastering the art of creating awe-inspiring crosshatch grill marks requires the right grill, preheating techniques, and precision in your approach. Prioritize functionality when choosing your grill for exceptional results. Preheat properly to set the stage for those perfect marks that elevate your dish. Practice rotating your food at a 45-degree angle for the exceptional crosshatch. Equip yourself with high-quality tools like a grill brush and reliable thermometer for flawless results. Understand the balance between direct and indirect heat for masterful cooking. Perfecting these techniques will take your grilling game to the next level and make your dishes truly stand out.
Choosing the Right Grill
When selecting a grill, we prioritize functionality over aesthetics to guarantee exceptional grilling results. Our focus is on features that enhance our ability to control heat, such as multiple burner options for various temperature zones. We opt for grills with precise temperature gauges, guaranteeing accuracy for the perfect sear.
Stainless steel grates are a non-negotiable for us, providing excellent heat retention and easy maintenance. A sturdy construction is key, as it ensures durability and longevity for countless grilling sessions.
Moreover, we look for grills with ample cooking space to accommodate different foods simultaneously without overcrowding. By choosing a grill that prioritizes functionality, we set ourselves up for success in achieving those coveted grill marks that truly impress.
Preheating for Success
In mastering the art of grill marks, our journey begins with the critical step of preheating our grill for success. Preheating isn’t just a mundane task but an essential ritual that sets the stage for impeccable grill marks.
To achieve those coveted sear lines, we must allow our grill to reach the ideal temperature, guaranteeing even heat distribution across the cooking surface. This process primes the grill grates, readying them to create those picture-perfect crosshatch patterns we aim for.
A properly preheated grill not only enhances the visual appeal of our dishes but also ensures the desired caramelization and flavor development. So, let’s not overlook the importance of preheating – it’s the foundational step towards grill mastery.
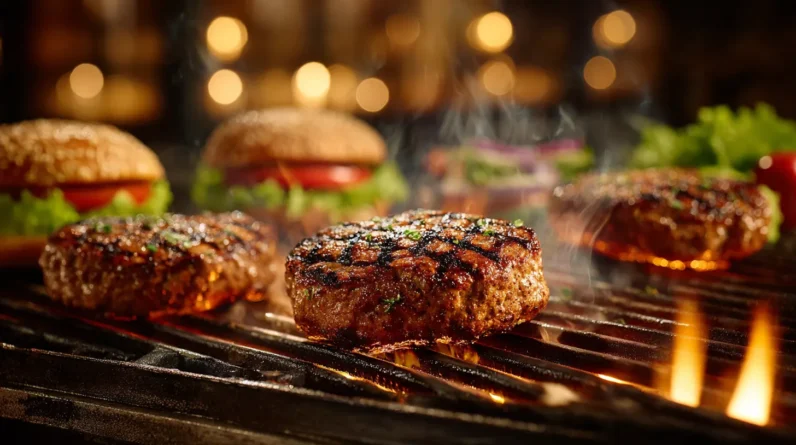
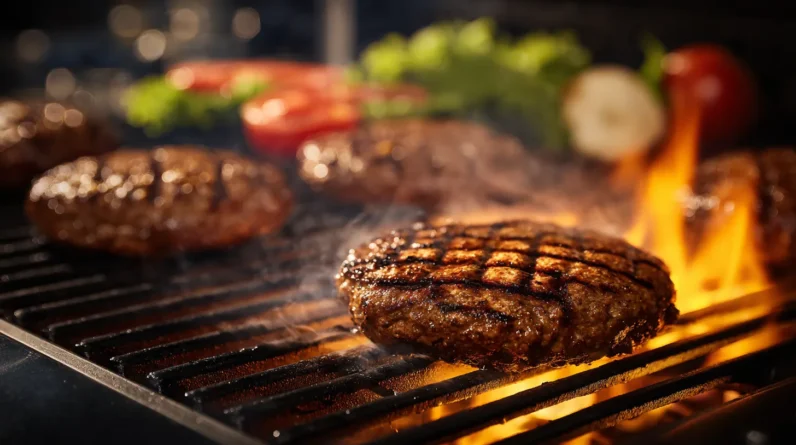
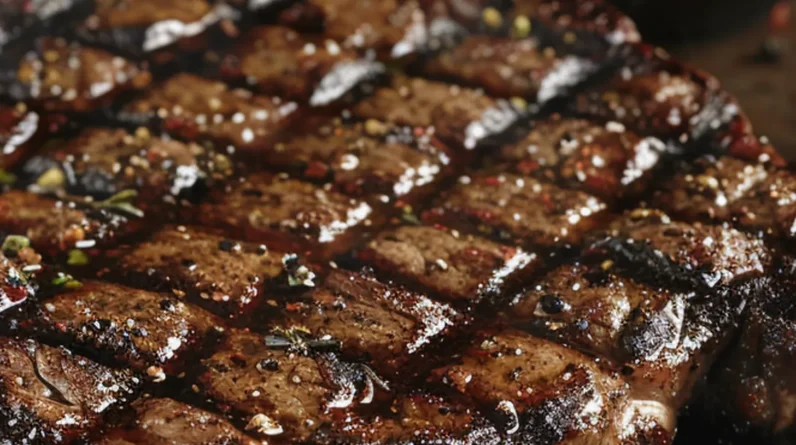
Mastering the Crosshatch Technique
Let’s explore the artistry of achieving flawless crosshatch patterns on the grill, a skill that elevates our culinary creations to new heights.
The key to mastering the crosshatch technique lies in precision and timing. Kickstart by preheating the grill to guarantee those distinct marks form beautifully. Place your food at a 45-degree angle to the grates, allowing it to sear for a few minutes before rotating it a quarter turn to create the first set of grill marks.
Then, flip the food and repeat the process, crossing over the existing marks to achieve that picture-perfect crosshatch. Remember, practice makes perfect, so keep honing your skills to impress with those impeccable grill marks that will have everyone craving your next masterpiece.
Essential Tools and Equipment
To perfect our crosshatch technique, we rely on specific tools and equipment that are crucial in achieving those coveted grill marks. A high-quality grill brush is essential for keeping the grates clean and free from residue, guaranteeing even sear marks.
Tongs with a good grip provide precision and control when flipping the food to create uniform patterns. A reliable instant-read thermometer guarantees that meats are cooked to perfection without overdoing them.
Moreover, investing in a grill press helps to secure even contact between the food and the grates, resulting in consistent grill marks. These tools, when used skillfully, elevate our grilling game and bring us closer to mastering the art of creating flawless crosshatch patterns.
Understanding Direct Vs. Indirect Heat
Understanding the difference between direct and indirect heat is essential for mastering various grilling techniques and achieving best results.
Direct heat is when food is cooked directly over the heat source, perfect for searing and quick cooking. This method creates those beautiful grill marks we all love.
On the other hand, indirect heat involves cooking food next to, rather than directly over, the flames. It’s ideal for larger cuts of meat that need longer cooking times without burning the exterior.
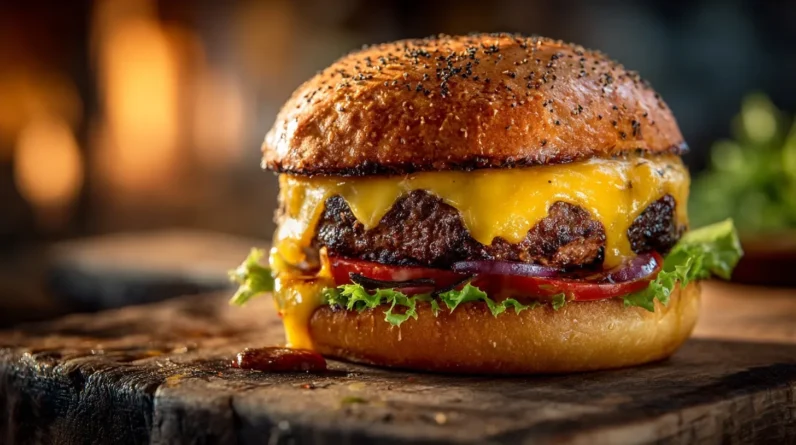
Seasoning Tips for Flavorful Marks
For achieving those perfect grill marks that burst with flavor, seasoning your food thoughtfully is key. We believe in the power of seasoning to elevate your grilling game to the next level.
Before you even fire up the grill, take the time to generously season your meat or vegetables with a blend of salt, pepper, and any other favorite spices. Allow the seasonings to penetrate the food for at least 30 minutes before grilling to maximize the flavor infusion. Remember, salt not only enhances the taste but also helps create those beautiful grill marks.
Experiment with different herb and spice combinations to discover what tantalizes your taste buds the most. Mastering the art of seasoning is the secret to revealing unforgettable grill marks that will impress every time.
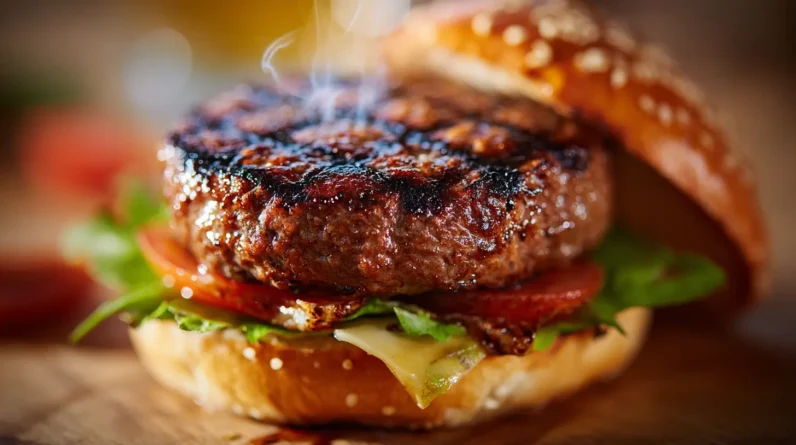
Flipping Like a Pro
Flipping your food on the grill is a skill that can make a significant difference in achieving those perfect grill marks and guaranteeing even cooking. The key to mastering the art of flipping like a pro lies in timing and technique.
Always preheat your grill properly to secure a hot surface for that satisfying sizzle. When it’s time to flip, use the right tools like sturdy tongs or a spatula to gently lift and turn the food. Aim for a confident flip to avoid any sticking or tearing.
Troubleshooting Common Issues
When troubleshooting common issues on the grill, we must address them promptly to guarantee a seamless cooking experience. One common problem is uneven cooking due to temperature fluctuations. To tackle this, make sure of proper preheating and consistent heat distribution across the grill surface.
Another issue often encountered is sticking food, which can be mitigated by properly oiling the grill grates before cooking. If flare-ups occur, don’t panic; simply move the food to a cooler part of the grill until the flames subside.
Moreover, if your grill marks aren’t coming out as expected, adjust the positioning of the food on the grates and avoid moving it around too much. By troubleshooting these common issues with precision and care, you’ll elevate your grilling game to new heights.
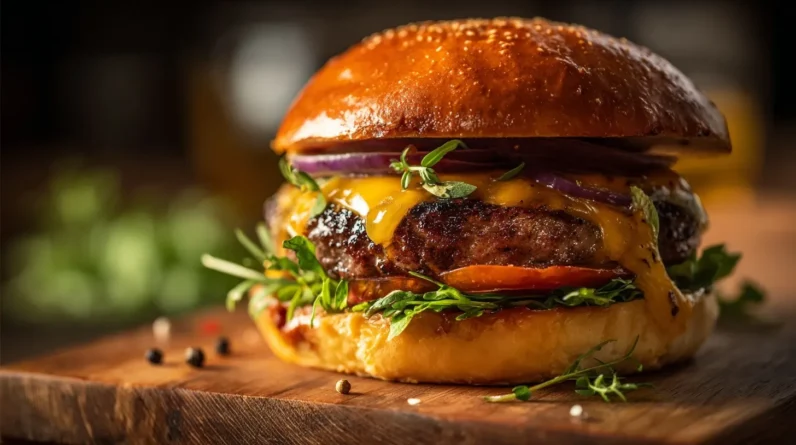
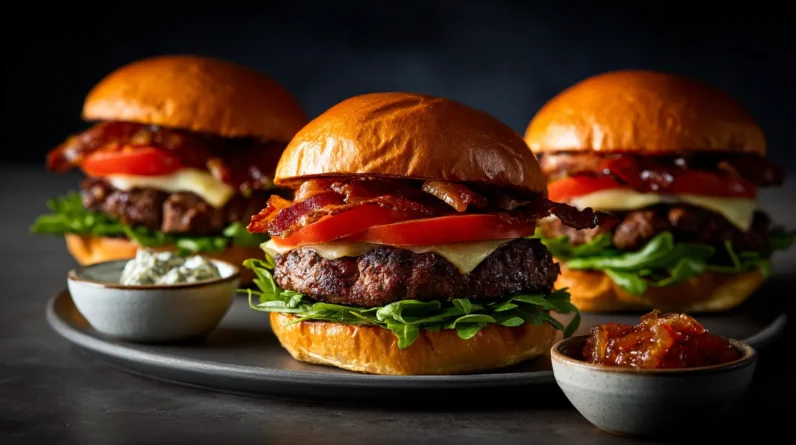
Presentation and Serving Suggestions
Let’s now explore how to artfully present and serve your perfectly grilled creations to enhance the overall dining experience.
When serving your grilled masterpieces, consider using a clean white plate to provide a stark contrast that highlights the beautiful grill marks. Arrange your protein and sides thoughtfully, creating visual interest and balance on the plate. Garnishing with fresh herbs or a drizzle of high-quality olive oil can enhance the presentation further.
For a sophisticated touch, contemplate integrating complementary colors for a visually appealing dish. Remember, the presentation is the first impression your dish makes, setting the stage for a memorable dining experience.
Conclusion
To sum up, mastering the art of creating perfect crosshatch grill marks takes practice, patience, and the right techniques. One example of this is when I used a cast iron grill pan to achieve beautiful marks on my steak, enhancing both the flavor and presentation. With the right tools, preheating, seasoning, and flipping techniques, you’ll be able to impress your guests with restaurant-quality grill marks that truly wow.
Keep honing your skills and soon you’ll be a grill master!